What to check when an AI headshot doesn’t look like you.
A polished portrait can still be the wrong face. Compare the result with a current photo, identify the mismatch, and change one thing at a time before spending credits on more variations.
AI-generated headshot · shared with permission · likeness approved by Carl
See the examples
Before-and-after examples
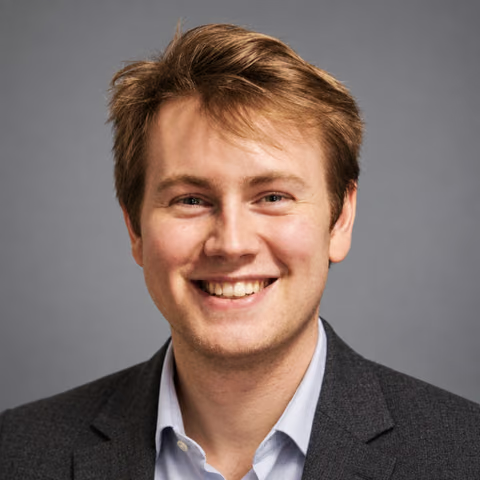
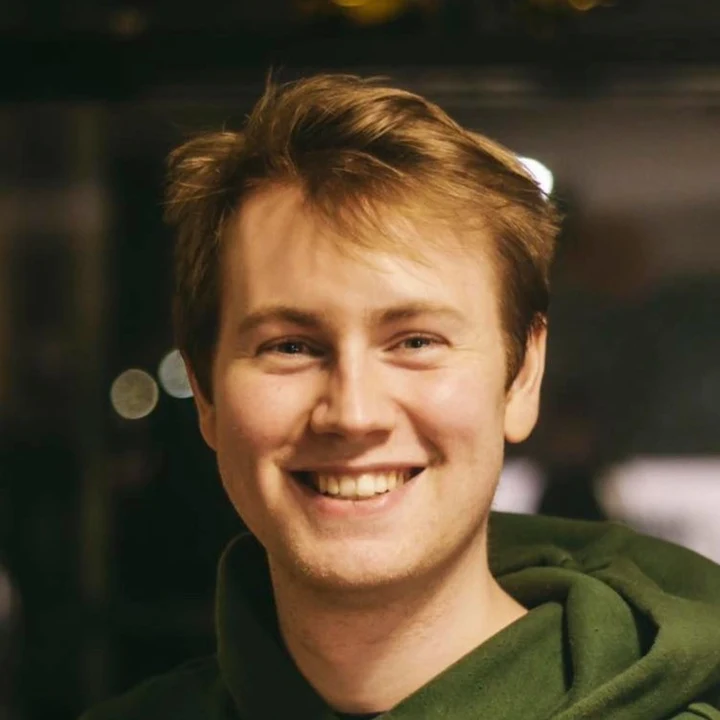
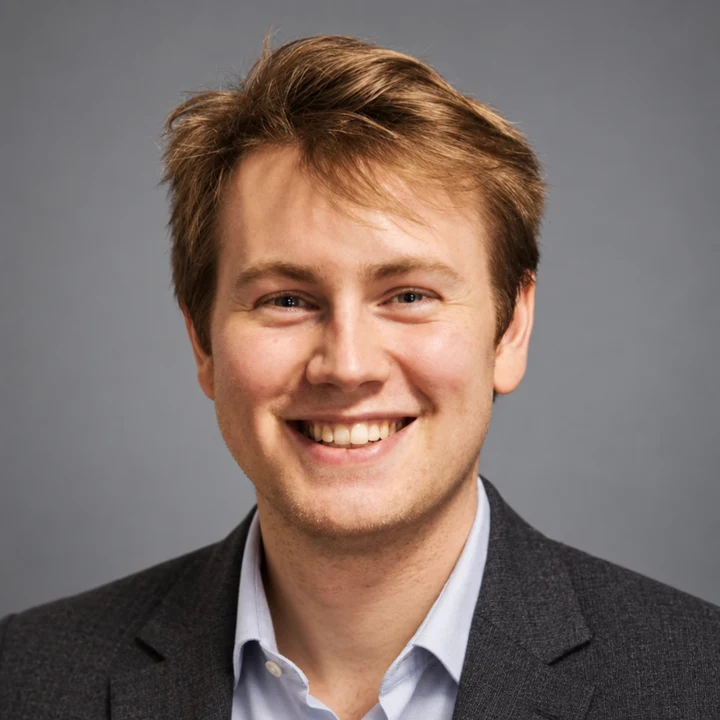
Use this approved reference-and-result pair to see what to compare: face shape, eyes, smile, and hairline. It is one example from Carl’s local verification run, not a success-rate study or a guarantee for your photos.
Carl’s headshot
Carl’s reference photo · shared with permissionFirst AI-generated result · likeness approved by Carl
One reference photo, the Studio headshots style, and the direction ‘A charcoal blazer, open collar, soft gray backdrop.’ This is the first and only result from that shoot, with no retouching. Carl reviewed it and confirmed: ‘Yes, the likeness is good.’ The example was made through the app’s upload, generation, storage, and download flow in a local verification run using the real image provider and test credits. It was not a paid customer order. Images were resized and converted for this page; individual results vary.
Source: How this example was made · Checked September 17, 2026. Images belong to their respective owners.
01
Separate a new style from a different face
Put the reference and result side by side at a similar size. Clothing and lighting may be different by design. Focus first on whether the face still represents you.
Face shape: check the jaw, cheeks, nose, and relative spacing of the features.
Eyes and glasses: check the eye shape, eyebrows, and whether the frames still look familiar.
Smile: compare the mouth shape and visible teeth rather than judging only how friendly it looks.
Age and texture: look for smoothing or changes that make you look unlike your current self.
Hair: compare the hairline, style, and facial hair with your current reference.
02
Check whether the reference shows the missing detail
If glare hides your eyes or a filter changes your skin and face shape, choose a clearer original. If the references show different hairstyles or ages, use a consistent set that reflects your current appearance.
These checks help you choose useful input; they cannot tell you exactly why a particular generation went wrong. AI portraits are newly generated images, so even clear references can produce a result you do not approve.
03
Simplify the next set of directions
Start with one outfit, one background, and a familiar expression. Remove requests for an idealized face or dramatic changes to your appearance if your goal is a recognizable work photo.
For example: ‘Shoulder-up headshot, navy crewneck, neutral background, relaxed expression. Keep my current facial features, hairstyle, glasses, and natural skin texture.’ Review the result; naming a feature does not guarantee it will be preserved.
04
Choose between an edit and a new photo
If you approve the face but want a different backdrop or outfit, open the photo in Studio and describe that change. Review the entire edited image afterward because other details may also change.
If the face itself is wrong, revisit your references and directions before generating again. Check the displayed credit cost before either action. Repeated attempts can use your balance without producing a result you like.
05
Check the final crop and know when to stop
After approving the face at full size, preview the portrait as a small avatar and in the crop you intend to publish. A tiny preview can hide problems that are visible in the downloaded image.
If you still do not recognize yourself, keep your current real photo or take a new one. For a portrait where likeness must be exact, a conventional photoshoot may be a better fit. Do not publish a result simply because it looks polished.
Your next photo starts here
Choose a look. Make it yours.
Upload your selfies, choose a style, and describe your photo. Review the credit cost in Studio before you start.
Results vary. Keep the photos you feel represent you.
$19USD · one time
100 credits · up to 50 photos
$39USD · one time
300 credits · up to 150 photos
$99USD · one time
1000 credits · up to 500 photos
Each photo or edit uses 2 credits. Edits use the same balance. Any tax is shown at checkout.
What if a photo fails or I don’t like the result?
A failed photo automatically returns its reserved credits. Completed photos use credits, even if you dislike the result; that does not automatically return credits. Each new attempt or edit uses 2 credits. Review the cost in Studio before starting.
Can I request a purchase refund?
Yes. Contact support with your order identifier and the issue. Returning credits for a failed photo is different from a cash refund. Requests are reviewed under our refund terms, the purchase conditions, and applicable law; there is no unconditional satisfaction guarantee.
A few things to know
Your questions, answered.
Can an edit change my face as well as the background?
Yes. An edit generates a new result and can change details beyond the requested area. Compare the whole image with your reference before using it.
Does a completed generation mean the likeness is verified?
No. Completion means an image was produced. You decide whether the result looks like you and is suitable for the place you plan to use it.
Can you guarantee my next attempt will look right?
No. Clearer references and simpler directions give you a more deliberate way to try again, but results vary. You can choose to keep a real photo instead.
 AI Photos of You