 AI Photos of You
Reference photo guide
How to choose reference photos for AI portraits.
Start with photos that make it easy to see what you actually look like. Use this checklist to choose your references before spending credits on a headshot, dating photo, or new portrait.
Prepare your photos in StudioFrom $19 USD. Pay once, no subscription.
Your reference photos stay private. How your photos are handled
Choose photos that reflect how you look now
Look for recent photos with your current hairstyle, facial hair, and everyday glasses. If two photos show noticeably different appearances, choose the one that reflects how you want people to recognize you today.
Use photos of yourself and confirm the consent requested in Studio. Leave out group photos so the intended person is unambiguous.
Check the face before the background
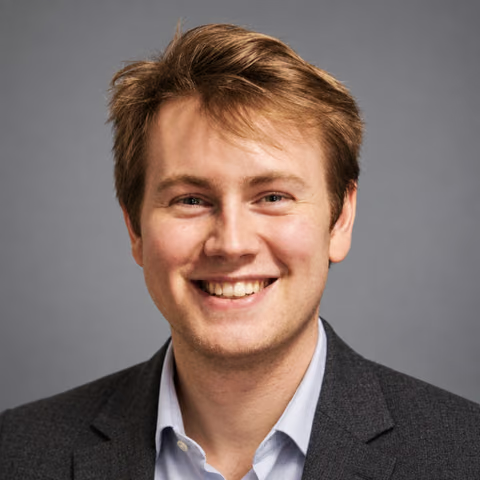
Open each candidate at full size. Can you clearly see the eyes, face shape, hairline, and skin texture? A plain room is fine; a beautiful location does not make a blurry face a useful reference.
For a new selfie, try facing a window in soft daylight and hold the camera near eye level. Avoid holding it so close that your nose or forehead dominates the image. Review the photo before uploading it.
- Keep: a sharp face, visible eyes, natural skin texture, and an unobstructed view.
- Retake: motion blur, heavy shadows across the face, glare hiding the eyes, or hair covering key features.
- Leave out: beauty filters, face reshaping, sunglasses, and screenshots with a tiny face.
Use useful variation, not repeated copies
If you use several references, choose a clear front view and slightly different angles that still show your face. Repeated copies of the same photo do not show anything new. Keep your appearance consistent across the set.
There is no guaranteed number of photos that establishes likeness. Our published headshot example used one reference and was approved by Carl; that single result does not establish what will work for another person.
Prepare the file and upload it privately
Studio accepts JPEG, PNG, and WebP files under 8 MB. If your phone saved a different format, export a copy in one of those formats; changing the filename extension does not convert the photo.
Wait for each reference to finish uploading before generating. Reference photos stay private; uploading a photo does not publish it in our example galleries.
Start with a simple portrait and review it
Choose the headshots look and describe a straightforward outfit, background, and expression. For example: ‘Plain navy shirt, soft gray background, relaxed expression. Keep my current hairstyle and everyday glasses.’ These are directions, not guarantees.
Compare the result with your reference before trying more looks. Check the face at full size first, then at the size you will actually use. If it does not look like you, use the likeness guide below to decide what to change.
Your next photo starts here
Choose a look. Make it yours.
Upload your selfies, choose a style, and describe your photo. Review the credit cost in Studio before you start.
Prepare your photos in StudioResults vary. Keep the photos you feel represent you.
A few things to know
Your questions, answered.
Do I need a professional reference photo?
No. A clear, current selfie can be a reference. Focus on whether the face is visible and recognizable rather than whether the setting or clothing looks professional.
Should I retouch my references first?
Avoid edits that reshape your face or remove the texture and features you want the result to preserve. Use a clear original instead of a beautified version.
Will more reference photos guarantee a better result?
No. More photos do not guarantee likeness. Choose clear, consistent references and review each generated result yourself.